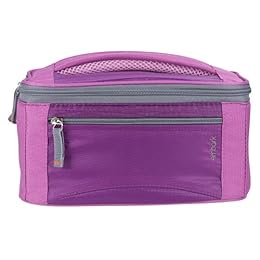
Nothing gets my blood pumping like find a good deal! Today a trip to Rite Aid turned into a big deal, as in $1 lunch boxes. This deal ends Saturday, so hurry in. All lunch boxes are 50% off and then a $2 up reward, the prices start at $5.99 and go up to $19.99. The $5.99 ones seemed more than adequate for my kids so I scooped up two, $5.99 at half off = $2.99 - $2 up reward = $1!! Woohoo!
The still had a great selection at my Rite-Aid, I snagged a pink one with cupcakes and a black one with pink hearts.
Good luck!

Friday, July 30, 2010
Family Fun: Make your own cookbook
Last week I used some leftover marinara sauce to make a baked ziti, which turned out pretty yummy. As we were cleaning up my oldest daughter, Quinn, looked at me with her most serious face and asked, "Mom, when I get bigger will you give me this recipe?" The fact that she thought a simple dinner required a detailed recipe only added to the swell of pride I felt in that moment. Later when my girls were all tucked in I started searching the internet for a make-your-own family cookbook.
Somehow I ran accross Muffins and Mayhem, from what I gather, a mother who had learned she had cancer wanted to preserve family recipes for her young kids if something should happen. It became part cookbook, part memior. Several years later and cancer free, a published cookbook and website were under her belt.
So, this is where we come in, the website Muffins and Mayhem allows you to creat your own cookbook for free. Yes, I said free! This great site allows you to create your own family cookbook adding recipes, stories, pictures, the whole nine yards. You can even create a cover. After your cookbook is complete you can print it at home or take it to Kinko's or any of the office copy stores to have it printed professionally and even bounded.
What a great idea! I can't wait to get my recipes together and uploaded. What a special gift to be able to give your children! And since it is free you know it fit's my budget!!
Wednesday, July 28, 2010
Raise your hand if you like free toothpaste!
I used to cringe when I asked my hubby if he needed anything from the store and he responded, "Probably just some razor blades." In fact, I had a mental list of things I dreaded buying: razors, razor blades, deodorant, toothpaste, toothbrushes, body wash, shampoo... I could go on but you get the picture. Add a few of those items in and I was sure to add $20-$35 to our Wal-Mart bill. Then my friend introduced me to couponing and The Drugstore Game, to say it has changed my life may be an understatement. I haven't paid more than $1 for any of those items in months and most of the times get them free, and now I have built a stockpile so I never have to pay full price again!
I get excited about couponing, ok, excited may be an understatement, I get estatic. About the only thing that gets me more excited than free toiletries is helping someone else learn how to get free toiletries and save serious coin on other things!
 |
| This was after a trip to Rite-Aid, $28 worth of stuff for $2.67 and $17 back in Rewards and SCR! |
Couponing Do’s
- Shop at stores that double your coupons: Kroger, Lowe's, Bloom, Harris Teeter, Giant, check your local stores. Some stores even triple!
- Keep an eye out for special store coupons that may be used in combination with manufacturer's coupons. Rite Aid, Walgreens and Target do this frequently. Rite Aid occasionally even has in-ad and online video value coupons.
- Pay attention to the unit cost of an item. Large sizes usually mean better value than buying small sizes, however sometimes using multiple coupons to purchase multiple smaller sizes can actually be much cheaper. Tide, diapers and Dawn are a few good examples.
- Start a stockpile! Set aside $5 - $20 of your grocery budget each week, whatever works for you, use that amount to buy items that are at a great price that week. If there isn’t anything that is a great price save your stockpile money for next week.
- Look for combination bargains. Check if you can get an item for a reduced price by using a coupon and also sending in for a refund/rebate on that item. Refunds and rebates are actually where much of the savings can be found. Couponing blogs (more on those next week) are a great place to find rebates as well as Googling the product or brand.
- Do comparison shopping! Who knew that these sneaky retailers changes prices so drastically between stores (Target and Wal-Mart are two of the worst offenders), make sure to always check the competition too. Amazon.com has really stepped up as a player too, with their fast shipping and reasonable rates if you can wait a few days for an item it may be worth considering.
- ·Do keep your coupons organized. There are many coupon organizers on the market but you don;t need to spend a lot, I use a 13 tab organizer that I bought at Wal-Mart for 4 bucks. Separate your coupons by categories that work for you. Twice monthly, sort through them and pull out those that will be expiring soon, so that they can be used, if possible, before they expire.
- Find others who coupon and trade with them; they can be on the lookout for coupons you can use, and vice versa.
- Be willing to switch brands to take advantage of lower prices and/or coupon offers.
Couponing Don’ts
- Don’t buy items you normally would not just because you have a coupon for it. I make an exception if the item will be free or a money maker.
- Don’t buy brand name items if the store/house brand is cheaper unless you have both coupons and rebates for the brand name item to justify the higher initial cost.
Tuesday, July 27, 2010
DIY: A simple centerpiece
I like to switch things up in our house often. I think it is because in the first 7 years of our marriage my hubby and I lived in 13 different houses. I'm not kidding, I still owe my Mother-in-Law a new address book because she had to cross out and re-write our address so many times we spilled over from the R's to the Q's and maybe even the P's. The good news is we have been in our house a while and plan to be here for several years. But to keep that new feeling I like to switch things up frequently.
One of the easiest and cheapest ways to keep things fresh and interesting is to change accessories rather than large pieces. In the year we have lived in our house I know that we have had at least 9 different centerpieces, so needless to say I change them often. A small item like a centerpiece can really change the feel of a room, especially in our house which is very open.
This is one of my favorite and most simple centerpieces:

It cost about $7, which is another reason to love it. If you are an avid wine drinker you could bring it down to $2. I loved the rectangle vase when I saw it in the craft section of you guessed it: Wal-Mart. I brought it home and liked the way it looked on our rectangle table. Then I had to figure out what to fill 'er up with??? I wanted something different, not the typical rocks, flowers...ect. They next week at Wal-Mart I saw these corks in a bag and I knew it was meant to be. My hubby loves wine so it fit our personality too. I scooped up two bags of corks sand rushed home to join the cork and vase in holy decorating matrimony. And ta daa!! Isn't it a beauty? The best thing is I can easily take the corks out and use the vase for something else too, maybe some acorns in the fall....oooo, I'm liking that!
Happy decorating : )
Monday, July 26, 2010
Too cool for school
Back to school sales are popping up galore this week! When I was a kid I loved it when my mom would declare that we were going shopping for school clothes, it meant we got to go to the mall that is 2 hours away (remember, we live in "fly over" country) and make the day of it. My girls will probably need therapy one day to reconcile the fact that unlike millions of other kids they don't get to experience this every August.
One of the reasons goes back to my childhood memories of these trips: After loading 3 kids into our spaceship like Chevy Lumina van, driving 2 hours, then shopping for hours to find clothes that fit (one of my bros is super tall and skinny which caused many pant shopping issues) my mom was completely frazzled. By the end of the day it seemed that price became less of an issue so my mom always seemed to spend more than she intended.
The other reason I am robbing my children of this yearly rite of passage is simple: it doesn't fit in our budget. Don't worry though, my girls aren't wearing outdated,wrong sized hand-me-downs, actually we get tons of compliments on their outfits. I'm going to let you in on a little secret, do you promise you won't tell? Ok, here goes : My kids wear used clothes, wait, pre-owed clothes, that sounds better. Yes, my kids wear pre-owned clothes! I'll let you in on another secret, we save lots of moolah wearing pre-owned clothes!
Whew! Glad that is off my chest! If you know me it's not really a big secret though, I can't keep a good deal to myself so I share my frugal ways with anyone that will listen. I have 3 sources I typically use to score cheap threads, 1.Ebay.com, 2. Goodwill or thrift stores and 3. Good, old-fashioned yard sales.
Ebay is a gold mine for quality, name brand, pre-owned kids clothes. The younger the kid the better the deals! Much like my Pottery Barn decor style and Wal-Mart budget, I yearn for my kids closet to be filled with cute pieces from Gap, Gymboree, Ralph Lauren, 77 Kids...ect. My budget, however, just doesn't stretch that far. Ebay is a different story though! I often find a lot of clothes with these name brands for a fraction of the new stuff. But, with anything, you make mistakes at first and I made more than a few. In order help you get ahead of the curve here are my Ebay buying tips:
1. Narrow your search by size, then brand if it matters to you. If you are looking to score a bunch of items look in "lots" or "outfits & sets". If you are looking for a specific item (dresses, sweaters, outerwear) scope out those sections. I have great luck finding large lots of clothes (50 - 75 pieces) for around $175 - $200, between $3-$4 an item, whereas one pair of jeans at any of the previously mentioned stores will set you back $20-$30 bucks.
2. If you find an item you like check out the sellers feedback first and comments. This is found in the upper right part of the screen under "Seller Info". I typically like to stay with more established sellers but will purchase from a new seller if it is an inexpensive item. If a seller has less than 95% feedback I would be hesitant to do business with them.
3. Make sure you take a look at the shipping costs. A $5 sweater with $10 shipping isn't a great deal. Some sellers like to tack on extra shipping costs to increase their revenue.
4. Don't get caught up in the bid process! Go in with a set price for that item and don't get in a bidding war then forget all about your price. It is easy to fall victim, so before I log on I make a list of what I am looking for and what my max is for each item.
5. Don't rush. I typically look around for a few days before I make a decision just so I know how much typical items are going for.
6. Shop Monday - Thursday. Just like the mall, Ebay has less people browsing the items during the week so it is best to look for auctions ending those days. Wednesday and Thursday are better than Monday and Tuesday because many people will look over the weekend and may place a bid on an item ending within a day or two. If you decide to start selling your kiddo's clothes on Ebay you want to do the opposite and have auctions that end on Sunday afternoon - night.
Now, I know some of you are saying, that's great but I don't have hours to spend on the internet looking for clothes. But, think of how much time you spend shopping with your munchkins in tow looking for clothes, even if you don't drive 2 hours.
As far as Goodwill and yard sales, I always check the item to ensure it is in good quality without any rips, tears or stains and that it is a good price.
After 7 years of ebaying to fill my kiddo's (and mine and my hubby's) wardrobes I am a pro so feel free to hit me with your questions. Happy bidding!
One of the reasons goes back to my childhood memories of these trips: After loading 3 kids into our spaceship like Chevy Lumina van, driving 2 hours, then shopping for hours to find clothes that fit (one of my bros is super tall and skinny which caused many pant shopping issues) my mom was completely frazzled. By the end of the day it seemed that price became less of an issue so my mom always seemed to spend more than she intended.
The other reason I am robbing my children of this yearly rite of passage is simple: it doesn't fit in our budget. Don't worry though, my girls aren't wearing outdated,wrong sized hand-me-downs, actually we get tons of compliments on their outfits. I'm going to let you in on a little secret, do you promise you won't tell? Ok, here goes : My kids wear used clothes, wait, pre-owed clothes, that sounds better. Yes, my kids wear pre-owned clothes! I'll let you in on another secret, we save lots of moolah wearing pre-owned clothes!
Whew! Glad that is off my chest! If you know me it's not really a big secret though, I can't keep a good deal to myself so I share my frugal ways with anyone that will listen. I have 3 sources I typically use to score cheap threads, 1.Ebay.com, 2. Goodwill or thrift stores and 3. Good, old-fashioned yard sales.
Ebay is a gold mine for quality, name brand, pre-owned kids clothes. The younger the kid the better the deals! Much like my Pottery Barn decor style and Wal-Mart budget, I yearn for my kids closet to be filled with cute pieces from Gap, Gymboree, Ralph Lauren, 77 Kids...ect. My budget, however, just doesn't stretch that far. Ebay is a different story though! I often find a lot of clothes with these name brands for a fraction of the new stuff. But, with anything, you make mistakes at first and I made more than a few. In order help you get ahead of the curve here are my Ebay buying tips:
1. Narrow your search by size, then brand if it matters to you. If you are looking to score a bunch of items look in "lots" or "outfits & sets". If you are looking for a specific item (dresses, sweaters, outerwear) scope out those sections. I have great luck finding large lots of clothes (50 - 75 pieces) for around $175 - $200, between $3-$4 an item, whereas one pair of jeans at any of the previously mentioned stores will set you back $20-$30 bucks.
 |
| This Ebay outfit was worn by my oldest on her first day of school |
2. If you find an item you like check out the sellers feedback first and comments. This is found in the upper right part of the screen under "Seller Info". I typically like to stay with more established sellers but will purchase from a new seller if it is an inexpensive item. If a seller has less than 95% feedback I would be hesitant to do business with them.
 |
| Here is my youngest in an Ebay outfit at Christmas |
 |
| Here are my girls at a family reunion in some deals I grabbed on Ebay from Gymboree and Gap |
4. Don't get caught up in the bid process! Go in with a set price for that item and don't get in a bidding war then forget all about your price. It is easy to fall victim, so before I log on I make a list of what I am looking for and what my max is for each item.
 |
| My oldest getting ready to head off to school, I got this 5 piece Gymboree outfit (tights not shown) for $12 |
 |
| Our girls at a TN resort in some Ebay duds, my youngest is in a Gap 3 piece set that I got with another outfit for $10! 8 pieces for $10!!! The older one is wearing part of a Gymboree lot that had 15 pieces for $45! |
6. Shop Monday - Thursday. Just like the mall, Ebay has less people browsing the items during the week so it is best to look for auctions ending those days. Wednesday and Thursday are better than Monday and Tuesday because many people will look over the weekend and may place a bid on an item ending within a day or two. If you decide to start selling your kiddo's clothes on Ebay you want to do the opposite and have auctions that end on Sunday afternoon - night.
 |
| Here is my baby Halloween of 2008 in her costume from Ebay that I sold for more than I paid for it last year. Have you ever seen a cuter lion! |
Now, I know some of you are saying, that's great but I don't have hours to spend on the internet looking for clothes. But, think of how much time you spend shopping with your munchkins in tow looking for clothes, even if you don't drive 2 hours.
As far as Goodwill and yard sales, I always check the item to ensure it is in good quality without any rips, tears or stains and that it is a good price.
After 7 years of ebaying to fill my kiddo's (and mine and my hubby's) wardrobes I am a pro so feel free to hit me with your questions. Happy bidding!
Saturday, July 24, 2010
Deals and Steals: 7/25-7/31
As a kid I loved playing board games, I was a weeeeeeeeee bit competitive, ok who am I kidding I still am. My new favorite game to play is The Drugstore Game, every week I use the incentive programs at the 3 major drug stores (Rite-Aid/ Ekard, CVS and Walgreens) to get bags of free and cheap stuff. Every week I will post the best of those deals here, in the Deals and Steals! So, without further ado, ladies and gents the best deals for this week.
Whoa! Step back into the dugout for a second, before I send you out to compete I need to give you a primer in couponing lingo:
OOP -Out of Pocket
WYB- When you buy
AR - After rebate
B1G1F - Also Buy One Get One Free
ECB - Extra Care Bucks from CVS (these will print at the bottom of your receipt and can be used like cash)
PEELIE - Coupon you peel off product
STACKING - Using Store Coupon with MFG coupon
SCR- Single Check Rebate from Rite Aid (these are regular checks that you will receive after submitting receipts at riteaid.com
UpRewards from Rite Aid, these are like ECB's, they print on your receipt and can be used like cash on a future purchase.
Ok, now your ready, watch out for that nasty curve ball though!

Transactions #1
Colgate Total $3, $3 UpReward
Use: $1 off Colgate Total Toothpaste from 7/11
or $1 off Colgate Sensitivity Toothpaste printable
= FREE + $1
Purex 3 in 1 Laundry Sheets (20 loads) 2 for $6, $1 Up Reward
Use: 2 $1 off One Purex Complete 3-in-1 Laundry Sheets printable
=$1.50 each
Nivea for Men Bodywash $1.99, $1 Up reward
Use: $3/2 Nivea Body Wash printable & $1 off Nivea Men’s Body Wash, 7/25 (if included in your paper)
=Free or Free +$1 if coupon is in paper
Kellogg's Cereal or Pop Tarts 2 for $4, $1 Up reward or 2 (There is also a $5 SCR if you buy $15 worth)
Use: $1.25/3 Kellogg’s Pop-Tarts printable
or $1/2 Kellogg’s Cereals, 10 oz +,printable or printable or $1.50/3 Kellogg’s Cereals printable
= $1 each
Listerine Pocketpacs or Reach Toothbrush $3.99 each, $2.99 SCR & $1 Up reward
use: $1 off Reach Toothbrush printable
=Free + $1profit
Hershey, Reese or Kit Kat, 10 for $5, $1 Up Reward
=$10.99 oop (don't forget to use $5 off $25 purchase from here
Get back $2.99 SCR & $8 Up rewards = $10.99 or everything free!
For a comprehensive list of deals, check out Southern Savers

Trans #1
Aveeno Products, $5.99 - $14.99. $10 ECB wyb $20 worth
2 Aveeno Positively Ageless Sunblock at $12.99use 2 $5 off Aveeno Positively Ageless Sunblock printable
= $25.98
Use:$4 off $20 email coupon,
2 $5 off
= $11.98 OOP (hopefully you have a few ECB's from last week)
Get back $10 ECB and $10 Mail in Rebate
= $1.98 OOP
Trans #2
U by Kotex products $4.99, $4.99 ECB
use: $1 off Kotex U printable (free + $1)
Dove Soap $3, $2 ECB
Photo Book $7.99, $7.99 ECB (makes a great gift!!)
= $15.98 -$ 1 kotex = $14.98
Use $10 ECB = 4.98
Get back $14.97 ECB!
For a comprehensive list of deals, check out Southern Savers
Whoa! Step back into the dugout for a second, before I send you out to compete I need to give you a primer in couponing lingo:
OOP -Out of Pocket
WYB- When you buy
AR - After rebate
B1G1F - Also Buy One Get One Free
ECB - Extra Care Bucks from CVS (these will print at the bottom of your receipt and can be used like cash)
PEELIE - Coupon you peel off product
STACKING - Using Store Coupon with MFG coupon
SCR- Single Check Rebate from Rite Aid (these are regular checks that you will receive after submitting receipts at riteaid.com
UpRewards from Rite Aid, these are like ECB's, they print on your receipt and can be used like cash on a future purchase.
Ok, now your ready, watch out for that nasty curve ball though!
Transactions #1
Colgate Total $3, $3 UpReward
Use: $1 off Colgate Total Toothpaste from 7/11
or $1 off Colgate Sensitivity Toothpaste printable
= FREE + $1
Purex 3 in 1 Laundry Sheets (20 loads) 2 for $6, $1 Up Reward
Use: 2 $1 off One Purex Complete 3-in-1 Laundry Sheets printable
=$1.50 each
Nivea for Men Bodywash $1.99, $1 Up reward
Use: $3/2 Nivea Body Wash printable & $1 off Nivea Men’s Body Wash, 7/25 (if included in your paper)
=Free or Free +$1 if coupon is in paper
Kellogg's Cereal or Pop Tarts 2 for $4, $1 Up reward or 2 (There is also a $5 SCR if you buy $15 worth)
Use: $1.25/3 Kellogg’s Pop-Tarts printable
or $1/2 Kellogg’s Cereals, 10 oz +,printable or printable or $1.50/3 Kellogg’s Cereals printable
= $1 each
Listerine Pocketpacs or Reach Toothbrush $3.99 each, $2.99 SCR & $1 Up reward
use: $1 off Reach Toothbrush printable
=Free + $1profit
Hershey, Reese or Kit Kat, 10 for $5, $1 Up Reward
=$10.99 oop (don't forget to use $5 off $25 purchase from here
Get back $2.99 SCR & $8 Up rewards = $10.99 or everything free!
For a comprehensive list of deals, check out Southern Savers
Trans #1
Aveeno Products, $5.99 - $14.99. $10 ECB wyb $20 worth
2 Aveeno Positively Ageless Sunblock at $12.99use 2 $5 off Aveeno Positively Ageless Sunblock printable
= $25.98
Use:$4 off $20 email coupon,
2 $5 off
= $11.98 OOP (hopefully you have a few ECB's from last week)
Get back $10 ECB and $10 Mail in Rebate
= $1.98 OOP
Trans #2
U by Kotex products $4.99, $4.99 ECB
use: $1 off Kotex U printable (free + $1)
Dove Soap $3, $2 ECB
Photo Book $7.99, $7.99 ECB (makes a great gift!!)
= $15.98 -$ 1 kotex = $14.98
Use $10 ECB = 4.98
Get back $14.97 ECB!
For a comprehensive list of deals, check out Southern Savers
DIY: Kid's room decor for less than $5
Hi, My name is Stacy and I am an HGTV addict. I love to decorate, kitchen, master bedroom, kids rooms...whatever. My room decor as a kid consisted of a few NKOTB (New Kids on the Block) and Michael Jordan posters, I am sure my mom didn't lose any sleep about how to decorate my room. But I yearn for more in my kids rooms. If I could afford to I would probably go to Pottery Barn Kids or Land of Nod and just pick everything from page 52 and have a super cute room for my girls, but Ikea and DIY decor fits my budget a bit better.
When we moved our youngest from her crib we bought her several pieces from the Mammut series from IKEA. The cute, whimsy style with IKEA durability and price was exactly what we needed. However, there wasn't a great selection of accessories to go with it though so I had to get creative. This is one of the items I came up with:

It literally took less than an hour and 5 bucks to create this masterpiece! Here is what I used:
Voila! Cute, cheap and in our case educational (our daughter was 2 and still learning her animals when we did this project) room decor!

We used animals but this project could easily be changed to fit any room. Michael's and Wal-Mart had a good selection of these wooden pieces, everything from animals to trains, sports, princesses! Or you could do 4 or 5 letters on each piece and do the alphabet, or print some pictures that match your kids decor, let your creative inner child guide you! If your child is older you can even get them involved, go ahead, get crafty!
Here is a looksy at Reagan's room with our finished product:

and another angle (toward the right side):

When we moved our youngest from her crib we bought her several pieces from the Mammut series from IKEA. The cute, whimsy style with IKEA durability and price was exactly what we needed. However, there wasn't a great selection of accessories to go with it though so I had to get creative. This is one of the items I came up with:

It literally took less than an hour and 5 bucks to create this masterpiece! Here is what I used:
- A piece of 8x10 craft wood, I found mine at Wal-Mart but have seen them at Michael's too. These set me back about $2.50 each.
- Craft paint, I already had the pink and red from another project but you can find it at Wal-Mart, Michael's, Hobby Lobby...ect for a buck or two each.
- Those super cute animals came from the craft section at Wal-Mart for only 27 cents each! They had a great selection. They are priced about the same at Michael's with an even better selection!
- The letters were printed on my home printer using a fun font and different colors.
- Coordinating color of ribbon, I already had mine but it was less than $2 a roll.
- My handy dandy tub of Mod Podge.
Voila! Cute, cheap and in our case educational (our daughter was 2 and still learning her animals when we did this project) room decor!

We used animals but this project could easily be changed to fit any room. Michael's and Wal-Mart had a good selection of these wooden pieces, everything from animals to trains, sports, princesses! Or you could do 4 or 5 letters on each piece and do the alphabet, or print some pictures that match your kids decor, let your creative inner child guide you! If your child is older you can even get them involved, go ahead, get crafty!
Here is a looksy at Reagan's room with our finished product:

and another angle (toward the right side):

Thursday, July 22, 2010
Filling up the freezer: Twice bake potatoes!

Twice baked potatoes show up often at our house around dinner time, so often in fact, I may need to give them a coat hook in the mud room. My kids love them, my hubby eats them up and since I make them in bulk they are an side on those nights when soccer + dance + PTO= little time for dinner prep. Luckily, a couple bags of these puppies will only take a couple hours, and are a fraction of the cost of store bought ones!! Here is what you need:
- 3-5 pounds of potatoes (you can use regular or red potatoes, I use whatever is on sale!)
- 12 - 16 ounces of sour cream
- a few cloves of fresh garlic, diced up pretty small
- a stick of butter
- Salt, pepper, seasoning salt - just a pinch of each
- grated cheese...mmm! I prefer about 8 ounces of each extra sharp and colby jack. WARNING: pre-grated cheese is by far inferior to it's cousin block cheese, if this were grade school kick ball grated cheese would get picked last. Take the time to grate it yourself.
- Bacon pieces are optional, my youngest munchkin doesn't like them so I usually leave them out

Once the potatoes are finished baking put your magazine down and let's get to work! First, cut them in half lengthwise, you may want to hold them in a dish towel or risk 2nd degree burns on your hands…ouch! Using a big spoon, gently scoop out the middle into a bowl, be careful so that you don’t damage the skins we need those for later.

After you have scooped them all clean, mix the butter & sour cream into the bowl. Use a potato masher and start smashing them up, you don't want them to smooth though, a few lumps are A-OK. If you need to add a little milk go ahead, you want them to be moist, not too dry. The sour cream, butter, milk ratio is at your discretion, but be careful not to add too much. Side bar to those who may not enjoy sour cream: I hate it too! It makes me gag, but I pinky-swear promise you can’t taste it.
Now, add in the seasoning salt, salt and pepper, just a pinch of each will do it, go ahead and throw in the minced garlic too. When that’s all good and mixed up start folding in some of the cheese you worked so hard to grate. Now that it's all mixed up it’s time to refill those empty skins and put them on a cookie sheet. I use an ice cream scoop and put a scoop in each skin.

After they are all filled up pop the whole pan in your freezer for about an hour or two to flash freeze them. When they good and frozen and won’t mix together, start throwing them into a Ziplock bag. I usually just put a whole bunch into big bags so I can take out what I need for dinner.

Now, you should have roughly 2 gallon bags full of potatoes to toss into the freezer, this usually last my fam of 4 about 2 months eating them once a week or so.
When that hectic night rolls around and it is time to cook them I pop mine in the microwave for 2-3 minutes to soften them up then finish them in the oven for about 30 minutes. Feel free to add bacon, chopped green onions (don’t add green onions before freezing, they get gross), more cheese whatever makes your heart content. Enjoy!
When that hectic night rolls around and it is time to cook them I pop mine in the microwave for 2-3 minutes to soften them up then finish them in the oven for about 30 minutes. Feel free to add bacon, chopped green onions (don’t add green onions before freezing, they get gross), more cheese whatever makes your heart content. Enjoy!
Wednesday, July 21, 2010
Lunch box essentials
The first day of school is right around the corner, less than a month here in WV. Since Jamie Oliver's Food Revolution hasn't found it's way to my kid's school it looks like I'll be packing lunches again for my girls. If you watched Jamie's show last Spring (which did take place in WV but about 3 hours from us) you saw that the majority of food served at our schools is pre-processed food. I love the cooks at my girls school, they are sweet ladies that truly care about the kids, however, they are limited in what they can serve. Hopefully one day the USDA will take a look at the school lunch guidelines and realize that we aren't doing our kids any favors with the food we are feeding them.
Ok, my rant is over, thanks for hanging in there with me. When I am packing a lunch for my munchkins my criteria is : #1. Healthy and #2. Cheap! Bonus if when my girls take inventory of their goods they think, "Wow! my mom rocks!" A mom can dream! At our girls school lunch will set you back $1.40, $1.40 x 2 kids a day = $2.80 x 20 days a month = $56. I am certain I pack it way cheaper than that! On Monday I posted how you could score a cheap or free lunch box for your kids. Keeping with the back to school theme and since my baby (ok, she is 4) is headin' off to preschool this year and I have been buying her lunch supplies I thought I'd share what I consider to be the essentials!


I love these little Ziplock containers! They are durable, reusable (we have used the same pack for 2 years of packed lunches everyday and they are still in great shape), and inexpensive so if your kiddo accidentally throws one away it isn't a big deal. I save lots of moollah by not buying single serving yogurts, applesauce, fruit...ect. Instead, I buy yogurt in tub, and put it in one of these, if you throw it in the freezer the night before or add frozen fruit it keeps it super cold! I also use them for fresh fruit, canned fruit, ranch dip for veggies or ketchup. You can find them just about any store for just a few bucks.


Ok, my rant is over, thanks for hanging in there with me. When I am packing a lunch for my munchkins my criteria is : #1. Healthy and #2. Cheap! Bonus if when my girls take inventory of their goods they think, "Wow! my mom rocks!" A mom can dream! At our girls school lunch will set you back $1.40, $1.40 x 2 kids a day = $2.80 x 20 days a month = $56. I am certain I pack it way cheaper than that! On Monday I posted how you could score a cheap or free lunch box for your kids. Keeping with the back to school theme and since my baby (ok, she is 4) is headin' off to preschool this year and I have been buying her lunch supplies I thought I'd share what I consider to be the essentials!


The first in my arsenal are the Funtainer Food Jar and Funtainer Bottle both by Thermos. The Food Jar is great for keeping foods hot until lunch rolls around. We love to put soup, chicken tenders, macaroni or leftovers in it. As long as everything is warm when it goes in it will stay warm all day. The Bottle has a flip top with a removable straw and does an excellent job at keeping drinks really cold. The only issue we have ever had was when I put flavored water (which was carbonated) in it, that didn't work out well!
The stainless steal is super easy to clean and doesn't retain odors like my kids beloved Broccoli & Cheese soup. Both BPA free too so no worries about leeching! There are several colors and even characters to choose from, they come in at around $15 each, however we are heading into year 3 with our older daughter's and it is still good as new! You can find them at Wal-Mart, Target, or a great selection at Amazon.

Next up, a sandwich container, This one is common sense and not exactly rocket science. It basically keeps a PB&J from getting smushed. These are super easy to find, usually for $1 or less.

I love these little Ziplock containers! They are durable, reusable (we have used the same pack for 2 years of packed lunches everyday and they are still in great shape), and inexpensive so if your kiddo accidentally throws one away it isn't a big deal. I save lots of moollah by not buying single serving yogurts, applesauce, fruit...ect. Instead, I buy yogurt in tub, and put it in one of these, if you throw it in the freezer the night before or add frozen fruit it keeps it super cold! I also use them for fresh fruit, canned fruit, ranch dip for veggies or ketchup. You can find them just about any store for just a few bucks.

When lunch includes something that requires a fork or spoon I throw in one of these Zoo Pals Cutlery pieces (my kids are only 4 and almost 7 so I know that this won't be an option for older kids but I'm sure you can find something similar). These, like the Ziplocks, are affordable and durable, much more durable than a regular plastic fork or spoon. We wash them and use them over and over again and at less than $3 a pack they aren't a budget buster.

If you are trying to save money, brown bagging your own lunch one or two days a week can add some serious coin to the piggy bank!. Any of the items above could easily be used to pack a healthy lunch for the office. I will be subbing and volunteering at my girls school a lot this year so I just bought myself a new lunch bag from Thirty-one. They have really cute and durable lunch totes that are insulated, you can even get them embroidered for a small fee. A friend of mine is a Thirty-one consultant if anyone is interested.
After all this food and lunch talk I am hungry! Do you have a lunch packing item that rocks? If so, let's here about it! Happy packing!
*NOTE: These are my opinions as a mom whose has found these products to be useful. I am not receiving any compensation or products from any of the brands or products I mentioned. I will be shelling out for them just like everyone else.
Tuesday, July 20, 2010
It's getting hot in here: Cool Summer treats!
Whew, the dog days of summer are here! Actually, I'm not really sure what the dog days of summer are but this summer has been miserably hot and humid here in WV. After one of the worst winters in decades we are now having one of the hottest summers in decades which means that I hear, "Mom, I'm hot!!!" about 437 times a day.
These popsicles have been a go to treat to serve my overheated munchkins this summer. They love them and since they are super healthy I have no guilt if they eat a couple a day! The great thing about them is you can they can be tailored to whatever fruits your kids like or what's on sale that week! Here's what we used:
 Frozen Strawberries
Frozen Blueberries
Yogurt - we used vanilla but you can use whatever you have
Milk
Carrots- Come on, trust me, you won't even taste them and they are a great way to sneak in some veggies
Frozen Bananas- I save the leftover parts from when the kids want banana in their oatmeal but don't want the entire banana. Just throw them in a freezer bag!

Optional: Protein powder. My youngest isn't the best eater so I cleared it with my pediatrician and we put in some vanilla protein powder in smoothies and popsicles.
Note: Since I use all frozen fruit I don't need to use ice. My kids complain that it makes the popsicles taste watery. I buy fruit when it is on sale cheap and throw it in the freezer for this purpose, a few weeks ago I snagged $1 pints of blueberries and I was thrilled!
I'm sure since this recipe is so complex that you are on the edge of your seat wondering what is next, here is the earth shattering next step: put all the ingredients into a blender. My assistants demonstrate proper technique:
 My youngest no longer wears real clothes, everyday is dress up to her!
Now, blend it all up so it's nice a creamy.
I usually let my kiddo's taste test it at this point and give them a smoothie. Then, break out my $1 popsicle molds from Family Dollar and start filling 'em up.

This usually yields enough to fill 2 popsicle molds (16 popsicles) and 2 smoothies.

Pop the molds in the freezer, they will be ready in a few hours. I have found that the smoothie makes the wait easier. Doesn't that look yummy, and as promised, there is no evidence of the carrots!

We like to get creative with the fruit we use too, if you have a yummy combo feel free to share it : )
Here is the budget breakdown:
I had all the ingredients on hand, but determined that the cost for the portions needed for the popsicles would be about $2, making each one cost about $0.12!
These popsicles have been a go to treat to serve my overheated munchkins this summer. They love them and since they are super healthy I have no guilt if they eat a couple a day! The great thing about them is you can they can be tailored to whatever fruits your kids like or what's on sale that week! Here's what we used:

Frozen Blueberries
Yogurt - we used vanilla but you can use whatever you have
Milk
Carrots- Come on, trust me, you won't even taste them and they are a great way to sneak in some veggies
Frozen Bananas- I save the leftover parts from when the kids want banana in their oatmeal but don't want the entire banana. Just throw them in a freezer bag!

Optional: Protein powder. My youngest isn't the best eater so I cleared it with my pediatrician and we put in some vanilla protein powder in smoothies and popsicles.
Note: Since I use all frozen fruit I don't need to use ice. My kids complain that it makes the popsicles taste watery. I buy fruit when it is on sale cheap and throw it in the freezer for this purpose, a few weeks ago I snagged $1 pints of blueberries and I was thrilled!
I'm sure since this recipe is so complex that you are on the edge of your seat wondering what is next, here is the earth shattering next step: put all the ingredients into a blender. My assistants demonstrate proper technique:

Now, blend it all up so it's nice a creamy.
I usually let my kiddo's taste test it at this point and give them a smoothie. Then, break out my $1 popsicle molds from Family Dollar and start filling 'em up.

This usually yields enough to fill 2 popsicle molds (16 popsicles) and 2 smoothies.

Pop the molds in the freezer, they will be ready in a few hours. I have found that the smoothie makes the wait easier. Doesn't that look yummy, and as promised, there is no evidence of the carrots!

We like to get creative with the fruit we use too, if you have a yummy combo feel free to share it : )
Here is the budget breakdown:
I had all the ingredients on hand, but determined that the cost for the portions needed for the popsicles would be about $2, making each one cost about $0.12!
Monday, July 19, 2010
DIY: Take that Anthropologie!
At the risk of the ridicule that will come from my mother, I’ll admit that I like to watch Cougar Town. Yes, Mom, it is smut but it’s funny smut. Anyhow, about the second or third episode I noticed these super fun and cute letters in Jule’s breakfast nook that spelled "EAT" (take a looksy, you can kinda see them behind the blonde's head). My heart swooned, and thanks to DVR I was able to go back and pause on the frame where I could see these letters I now so desired, here is a closer look.
For a couple of episodes I closely watched all the kitchens scenes trying to get a glimpse and did a few times. I had to know where these letters came from and how I could make them a part of my very own house. Since I live in the sticks, I scoured the internet and had no luck at finding them, probably because I wasn't really sure what to search for. I finally discovered that they hail from Anthropologie, but are $14 a pop (they have since been reduced to $8 but there is a very limited selection)! My killer mental math skills quickly determined that they would come in at fifty bucks after tax & shipping. Whoa...slow this decorating train down, I am WAY too frugal to drop $50 on them. I ended my search disappointed and then ate a big bowl of ice cream to console myself. In my sugar induced state I thought, “Hey, I could just make those.” After a few minutes of serious thought I realized that it won't be too hard.
So, the next day I was off to Wal-Mart to get my supplies. As I said before, I live in the sticks so heading to Michael’s or any other craft store wasn’t an option because they are all over an hour away. But Wal-Mart didn’t let me down and had what I needed which I determined to be: wooden letters to spell out E-A-T and a package of patterned cardstock, I went with a Martha Stewart one that had 24 double sided sheets and could be used for multiple projects. I already had a big tub of mod podge and paint brushes at home, but if you don’t go ahead and pick those up too. At this point I had invested $10.54 in my project (3 letters at $1.19 each and paper at $6.97), if you don’t have mod podge figure in a few more bucks but you should still come in under $15. Keep in mind, you’re only using 3 sheets of the scrapbooking paper and there will be tons of other projects the other 21 sheets of paper can be used for. So, if you figure the cost out per sheet of paper it comes in at $0.29,so each letter comes it at $1.48, Woo Hoo!
Here we go!
These are my letters, I opted to go with some fun whimsy ones:

Step 1: Determine your color scheme from the paper you purchased. I opted to do one color on top and a coordinating one on the sides.

Step 2: I measured the sides of my letters, they were about an inch so I cut 1 inch strips in the colors I chose. There was no way to do the sides with 1 continuous strip so I tried to hide my cuts as best I could.
Then, go ahead and lay your letter down and trace it on the paper then carefully cut it out.
Step 3: Brush mod podge on the inside of the paper and then carefully apply to all sides of the letters. After all the sides are covered apply mod podge to the outer edge of the letters. It will appear white but don’t worry, it will dry clear.

Now, apply the paper to the letter, make sure to hold it tight until it dries a bit so you have a nice seemless edge:

Step 4: Apply mod podge to the back edge of your cut out letter, then place the paper the front of the letter. Brush a layer of mod podge to the front of your letter, be mindful of brush strokes and finger prints as those can show up on the finished product.

Watch those brush strokes!

Step 5: WALK AWAY, I know it’s hard, but they need time to dry. A few hours or overnight should do the trick.
Here are mine hanging in my kitchen. Yes, I know they are different from the ones above, I've had mine for a few months but made these for a friend who loved them:

A little closer look:

Step 6: Hang those babies up, stand back and admire your work. You are on your way to becoming a DIY rockstar!
Back to School Bargains!
Think back to those late August days of your youth, remember the excitement that came with a trip to get a new backpack and if you were really lucky a new trapper keeper! Those were the days, now instead of the school supply excitement I get to buy the goods for my kiddos. Oh well, at least I can stockpile and save a ton, there are deals aplenty to be had! Now is the best time to stock up on the basics that you will need to send your munchkin(s) on their merry way when that first day rolls around. I like to throw in a few extra boxes of crayons and pencils for our crafts at home and even stocking stuffers. Keep in mind that many stores price match so don't waste gas driving all over town. Here are some of the best deals I've found for goodies this year:
Hot Lunch Box DEAL: Hurry to Wal-Mart or Target now and grab on of these Embark Lunch boxes, they start at $3 - $12.99. Here is the best part: they are full of coupons inside and you can even get a mail in rebate up to $4.96!
At $7.99 this one is a steal at Target! Inside you should find a coupon booklet plus an offer for a FREE 6 month subscription to Parents Magazine! There should be an advertisement tag on the side of the bag. If Parents Magazine isn't your thing or (like me) you already have a subscription you can write "REFUSED" on the advertisement, send it in with your receipt and they will mail you a check for $4.96! Can't beat that, especially if you find a $3 one! But wait...yep, it's gets even better! Check out the coupons that you'll find inside:
Booklet #1 (expires 12/31/11):
Yoplait kids yogurt – $1/2Minute Ride – $1/1,Capri Sun 100% Juice – $1/1, Purell Product – $1/1 (excludes trial), Pediasure 6-pack – $1.50/1, Arm and Hammer Kid’s Spinbrush Powered Toothbrush – $1/1, Carnation Instant Breakfast Essentials Multipack – $1/1
Leapster game – $5/1, Horizon Organic Single Serve Milk (8 oz) – $1/3, Yoplait kids yogurts – $1/2,Bumble Bee Premium Albacore or Light Tuna Pouch – $1/2, Dole Fruit bowls, gels or parfaits – $1/2

$0.15 Deals
various folders
$0.25 Deals:
24 pack Crayola Crayons
Composition Notebooks
Elmer's 2 Pack Washable Glue Sticks
Elmer's Washable Glue
1 Subject Spiral Notebooks
$0.60 Deals
Assorted Pencil Boxes
$1 Deals:
Post-It Notes (90 ct.)
Sharpie Markers (2 pk.)
Bic Mechanical Pencils (6 pk.)
Paper Mate Pens (10 ct.)
Magic Tape (300")
Crayola 10 Count Washable Markers
Crayola 12 Count Colored Pencils
Dixon 24 Count #2 Pencils
Bic 10 Count Pens, use this coupon $1/2 print coupon
$2.50 Deals
Georgia Pacific Copy Paper (500 sheets)
Avery 5-Tab Edge Dividers
Mini Water Bottle (18 oz.)
Folders (3 pk.)
Fashion Folder (1")
1-Subject Fasion Notebook
Here are the Office Max deals this week, ends 7/24
$0.10 Deal
Purell Original Hand Sanitizer (0.5 oz.) (No Limit)
$0.20 Deal:
All Just Basics Ballpoint Pens (10-pack) (No Limit)
$1 Deals:
OfficeMax mechanical Pencil Starter Kit
Just Basics erasers (5-pack)
OfficeMax 1-Subject Notebooks (100 sheets)
Scotch Magic Tap In Donut Dispenser
All Post-It 2×2 Notes (1-pack)
Liquid Paper Correction Fluid
Just Basics erasers (5-pack)
OfficeMax 1-Subject Notebooks (100 sheets)
Scotch Magic Tap In Donut Dispenser
All Post-It 2×2 Notes (1-pack)
Liquid Paper Correction Fluid

We have a DG really close so I'm excited, here are the Back-to-School Deals at Dollar General:
$0.50 Deals:
Bic Cristal Pens (8-pack)
3M Post-It Notes (200-count)
DG Office Index Cards (100-count)
One-Subject 70-sheet notebook (wide or college ruled)
DG Office Yellow #2 Pencils (10-count)
Westcott Kid’s Scissors
Raymond Geddes Crayons (24-pack)
3M Post-It Notes (200-count)
DG Office Index Cards (100-count)
One-Subject 70-sheet notebook (wide or college ruled)
DG Office Yellow #2 Pencils (10-count)
Westcott Kid’s Scissors
Raymond Geddes Crayons (24-pack)
$1 Deals:
Composition Notebook
Sharpie Ultra-Fine Permanent Marker
Elmers School Glue (4-oz.)
5×7 Fashion Notebook
DG Office Calculator
Activity Box
Filler Paper – Wide or College Ruled (125-count)
DG Office Zipper Binder Pouch
Liqui-Mark Colored Pencils (12-count)
3M Post-It Die Cut Notes (150-count)
3M Post-It Flags (50-count) — use $1/1 coupon here to get them free!

Target has a few deals, look for more in August:
Kid’s Scissors — $0.50
Pencil Case — $0.50

$0.25 Deals:
10-count case of Simmons Woodcase Pencils
2-pack Elmer’s Glue Sticks
24-count Crayola Crayons
12″ Rulers
2-pack Elmer’s Glue Sticks
24-count Crayola Crayons
12″ Rulers
$0.50 Deals:
Stretchable Book Covers
7-piece School Select Eraser Set
Mead Trapper Refills
7-piece School Select Eraser Set
Mead Trapper Refills
$1 Deals:
10-count Broad or Fine Crayola Markers
12-count Crayola Colored Pencils
10-count Mechanical Bic Pens
Bic Wite Out
Westcott 2-Piece Math Set
12-count Crayola Colored Pencils
10-count Mechanical Bic Pens
Bic Wite Out
Westcott 2-Piece Math Set
Subscribe to:
Posts (Atom)